Friday, October 24, 2014

Rockler Rail and Stile Bit

I've long envied the rail and stile bits when standing in front of the router bit Wall o' Awesomeness at Rockler of any other woodworking store. So when there was a crazy sale a year or so ago I picked up a couple sets of rail and stile bits and until now they've just taunted me from their home in my router table... well taunt no more it's time to get them working!


The first bit I tried was a Freud Matched Rail and Stile Bit which was an all in one bit see the link here to see what I mean . It's meant to run stiles through on one setting and then adjust the bit to run the ends of your rails after raising or lowering the bit. I couldn't figure it out the first time out so after messing with this for an hour or so I decided to abort and try the rocker matched bits.

Here are some pics of the bits I had from Rockler


After watching a few other blog posts and videos on the interwebs I decided a little pre-planning and preping for future cuts would be ideal here. Shout out to Mr. Wood Whisperer who has a great video on using these kinds of bits... you can check out that video below


I had some scraps from my soon to be routed door frames and planned them to the same thickness as my doors so I could make the scraps into setup blocks. Like Marc mentions it's important to mark which bit does what because it's EASY to forget and mess up your stock and of course if you're like me you're not made of money and having to run across town for "one more piece" of hardwood sucks especially when it's avoidable.

So here are a few pics of the setup blocks I made and their corresponding marks on the bits. 


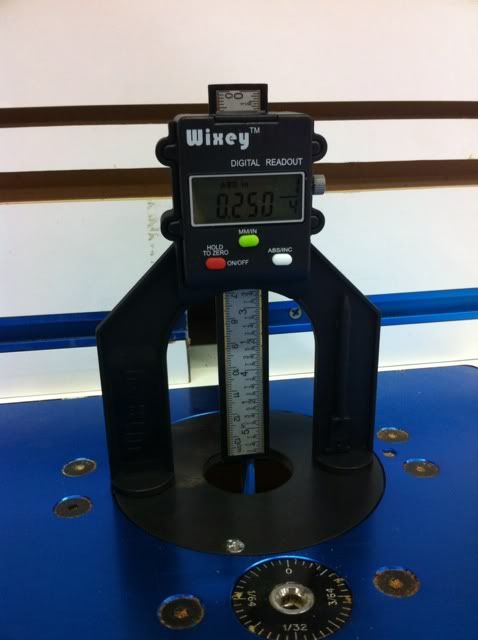
Getting this process down was a bit time consuming but once I had it down all went well. One thing to note when setting up your router for these jobs, since these bits may be a bit heavier than some of our other standard bits I found my router mount had worn a bit over time and during the start-up of the but the height adjusted on me. So make sure you have your router mount tuned to hold your heights tightly without movement when the bit spins up and vibrates the mount. 

I'll post some follow up pics of my milled up doors before I glue them up the joinery turned out awesome and I will definitely be using these for more projects!


Monday, October 20, 2014

Deluxe Big Green Egg Station Picture Gallery

As promised over on Lumberjocks here is a gallery of all the pictures I took during the construction of this project. Sorry for the duplicates if you find them something went weird between CTRL-C and CTRL-V. 


Alec Bradly


This past Sunday night with a nice evening in the shop planned and some fantastic weather to boot I decided it'd be a nice evening to break into my cigar stash and pick a winner. As i rummaged through I settled upon a nice a nice toro from Alec Bradly and before i get into the details of the smoke here are a few specs. 

Origin : Honduras
Alec BradleyFormat : Toro
Size : 6 x 50
Wrapper : Honduran Connecticut Shade
Filler : Honduras, Nicaragua
Binder : Honduras, Nicaragua
Hand-Made
Price : $5 MSRP (street price should be considerably less)


My first impression was that it's well constructed and has lasted well in my humidor these past few years. It cut well and didn't fall apart. The wrapper a honduran grown wrapper from Conn. Shade seed was very nice not oily and didn't lose it's structure throughout the smoke. 

The Smoke

It lit easily and had a nice draw not too tight but not wide open. The smoke itself was dense and light and was very enjoyable. It started off mild as one might expect from a Conn. wrapper but it wasn't as mild as one might expect it bordered a touch toward medium. The first bit had a lot of cedar and and was smooth and not bitter or biting. It burned perfectly level and held an ash nicely. The middle was more intense than expected but certainly not in a bad way it became more coffee-esque as it progressed from the middle on with the last few inches getting a bit more rough. Overall it was a great smoke and for the $5 price tag it's hard to beat. I haven't been disappointed by by any of the Alec Bradly sticks so far and look forward to sampling more as time goes on! 

THE END


Losing Weight

Since it's been quite awhile since my last post I looked around my shop at the various items to review and discuss and decided to focus on one of my favorite/best purchases in the past few years... and while I wish it were a Sawstop that day has not yet come. I'm talking about upgrading my drill/drivers from an old worn out Craftsman drill to something new. While the old Craftsman beast had served me well it did have quite a number of faults of which a few are below.


  • HEAVY! Dear God it was heavy. I didn't weigh it before i tossed it but it had to weight close to 10 pounds and it wasn't even a hammer drill!
  • Battery life! Sure it started out great but within a year the battery lasted maybe a few long screws and it was done and it gradually died during use. 
  • Fatigue! Since it was so heavy and large just using it became tough especially when doing overhead work or extended drilling. 


When I decided it was time to switch to something newer I did a bit of research and while the likes of Festool far exceeded my budget i didn't exactly want to settle with something bottom of the barrel either. I had in mind several check list items of which I've listed below. 


  1. Light weight! No more fatigue on long projects or drivings lots of screws!
  2. Battery life! 
  3. Quick Charging fr those times when I'm just tripping through screws and such. 
  4. Compact- I didn't want anything huge. 
  5. Power... nothing crazy since I wouldn't be doing anything too crazy but enough to drive those 3" lag screws when necessary. 


After looking around at the various different options I settled on the Dewalt 12V Max driver/drill/impact combo. I've pasted the specs for the drivers and drill below. 
  • Includes 1/4-in screwdriver, 1/4-in impact driver, 3/8-in drill/driver, 2 12-volt max Li-ion batteries, fast charger, 2 bit tips, 3 belt hooks and contractor bag
  • 3/8-in drill/driver offers a 2-speed transmission for high-speed in fastening and drilling through a variety of materials with 0-400 and 0-1,500 RPM
  • 1/4-in impact driver features 3 LED lights for increased visibility and shadow-free lighting
  • 12-volt max screwdriver features 1/4-in 1-hand loading hex chuck for easy bit changes
  • 12-volt max Li-ion batteries provide extended run time and long-lasting battery life; nominal voltage 10.8-volt, 12-volt max initial battery voltage
  • Li-ion batteries are backed by a 3-year limited warranty
  • 30-minute charger provides quick charging for minimum downtime
  • All tools include belt clip and weigh less than 2.4 lbs each for convenient carrying and easy portability

Here is a nice shiny picture of them new...

Here are a few pictures of mine after about two years of use!

This one is the driver which I use most frequently for driving screws and the like and have even used it very often for automotive applications with quick connect adapters for attaching my 1/4 and 3/8 sockets. 


The batteries are awesome not only do they charge quickly but the technology that allows them to run strong right up until they run out of juice. No more slowly dying while trying to finish the job 


I love these little guys. They hit all the points on my check list and then some. The shining star I believe of this set is they are very compact and very light which were two big items on my list. Beyond that I've found them very adept at reaching tight corners when needed and the bonus of bright LED's make drilling and driving in a dark cabinet no problem! Well that's all for now if you'd like more info feel free to reach out. 


Saturday, March 10, 2012

Sweet Sweet Digital Accuracy

Last month as a condolence prize for turning 30 years old I received from my in-laws a few items from my Amazon "woodworking" wishlist. I'll admit i sorta milked this whole turning 30 thing because my friends and family really did some damage to my woodworking wish list (sadly no sawstop). So today I'm reviewing the Wixey Mini Digital Height Gauge.  These can be found at your local Rockler right now on sale for $20 so not a huge investment. 
Thanks for the battery Wixey!

First use!
You've all been there at your router table, table saw, or whatever trying to get the exact measurement to the top of your router bit or table saw blade. Adjust, measure, adjust, measure, up, down, down, down OK i think that's 1/4 inch. So I figured I'd give this little baby a try. Wixey makes a whole cool line of digital measurement tools. If you haven't tried some of the digital measuring products I highly recommend them, they will not only save you time but frustration. This little guy comes ready to rock including the little nickle battery which if not included are normally not something just laying around the house. I quickly feel in love with this little depth/height gauge. When you want to measure a depth of something Wixey includes a little attachable needle and conveniently makes it nest in the foot!
Sweet depth gauge needle stored conveniently!

First you set the gauge on the table top or in this case the router plate and push the ruler down to the plate and zero out the gauge now your ready to get your reading. Unfortunately since most router plates are aluminum the magnets on the feet don't work and if there was one improvement I'd make it would be to make the base itself heavier so I could adjust the bit height without having to hold the feet down.
Bingo 1/4 inch and ready to route!
Overall I wish I would have gotten this guy sooner because it makes things just so dang easy especially when  at the router table and finding the top dead center measurement at the table saw. So next up on my reviews of the Wixey line of products is the Digital Planer Readout for my Dewalt 735. Once i get it installed and tested I'll be posting it up here.


Thursday, March 1, 2012

Where Did Mr Fix It Go?

The other day my wife called me and said "Um my check engine light went on and my car won't go." I could almos hear my wallet gasp in terror as she told me this. So like any husband who gets a call like this my response was "Where are you ill come get you." so I went and got her and the car home and tried to decide what to do next. I've been under,over, and through this Chevy Trailblazer a dozen times for various reasons but at 150k miles I'll admit I started dreaming of a new F150 crew cab, then I started having nightmares about a new car payment. Ok I better try to fix this myself. So over the past few days I've been on the hunt with this car to fix the issue which at the end of the day seems to have been a bad accelerator position sensor about $160 part and two bolts to replace. When I retold this tale of auto issues and my ensuing quest for a fix a few guy friends of mine responded with "Really you fixed it yourself? How did you know how?" Now I know some of you are probably wondering if this is going to be some post on how awesome I am or how I triumphed over a mechanical challenge but my real purpose of this post was to ask the question " Where has Mr fix it gone?" Why are the majority or people so surprised when we fix something ourselves or build a piece of furniture?Somewhere along our path in the past few decades as men I think we were told "Why do it yourself if someone else can do it for you." This bothers me. I will say i might be a bit young to complain about "young people" but I find it scary that the younger generations are no longer being taught in school about auto shop, woodworking, metal craft, etc.. I know as my young son grows up I certainly will be teaching him the determination of fixing it himself. I think our community of woodworkers and amateur tradesmen has a responsibility to mentor the younger generation in the art of DIY I guess my question to all you out there how did Mr Fix It turn into Mr Call Someone and what can we do to change this?

Tuesday, February 28, 2012

Get a Grip Man!

I'm sure most of you have been hit up at your local Rockler to check out the "Bench Cookies" which I'll admit I have a dozen of now (put a cute name on something and my wife will buy it). The gripping surface is good I'll give them that much and they will hold their grip even with a decent amount of dust on the gripping surface. If you look at the gripping surface it looks suspiciously like the material on the underside of a mouse pad... hmm homemade bench cookies in my future? So in certain "grippy" situations like sanding, scrapping, or finishing they've come in quite handy! Now recently while lurking my local Rockler I was hit up to try their new or newish Bench Dog Ultra Push Block (pic below). I've resisted their attempts to sell me on several occasions. Well this time I got sold... they hit me up AND they a demo with my current push blocks. Needless to say the $7.00 they were selling them for was well worth buying two of them when i saw how much more grip they had compared to mine. And it's like my first shop teacher always said "Safety first!" actually he said "Don't be a dumb ass or you'll lose a finger." So in the spirit of not being a dumb ass I retired my old non-grippy push blocks. I was amazed at the difference and feeling of control i had especially at the router station. When I compared the old blocks it was like using blocks of ice they had no grip at all! I even grabbed some fine sanding dust threw it on the gripping surface to see how it held up... and it held surprisingly well! Now we'll see how they stand the test of time. So moral of the story "Don't be a dumb ass for $7.00" invest in your safety and work piece control. 

I like these new blocks at the router table above all else. 
My old push block... well not the actual one but you get it!
New grippy push block!


Monday, February 27, 2012

Fine Irwin's I'll Try Your Chisels!

I've known for some time that my nameless chisel set would have to go. I'm not even sure where they came from but I have a sneaking suspicion they came from Harbor Freight because the look like they have one foot in the grave and their edge crumbles like dry dirt at the mere sight of mortise that needs cleaning up. So while at Rockler for their "Brown Bag" sale last Saturday I picked up this set of 4 chisels for $29.99. The overall construction seems solid. My plan is to first flatten the backs this weekend, and put a secondary 5* microbevel on the already ground 25* primary bevel. I will admit that the woodworker in me feel somewhat uncomfortable with a chisel that has a plastic handle and not a wood one it's like seeing Sylvester Stalone attempt a romantic scene in an action flick... awkward. 
Here at the chisel details from Rockler's website in case you all were wondering. 
An excellent chisel set with rugged plastic handles and the incomparable steel blades. The Blue Chip Handles have a '' rounded square'' cross section that fits comfortably in the hand, making the chisel easy to control regardless of the angle of the blade
The Bevel Edge is now the most popular type of general purpose chisel. It is used for chamfering, dovetailing and making clean cuts in tight corners where a firmer chisel would jam.
Set of 4 contains - 1/4'' , 1/2'' , 3/4'' , and 1'' chisels


Hopefully these chisels will fill in for awhile until I can get my ultimate set of chisels the Two Cherries 6 piece chisel set! But unfortunately at the moment I cannot justify the $170 price tag of this chisel set! 
If you're looking for a great book on sharpening I'd totally recommend the book below it's fantastic and has alot of great full color photography in it! Ron Hock does a great job taking you from square 1 to hair shaving sharp edges. 

The Perfect Edge: The Ultimate Guide to Sharpening for Woodworkers


Two Palm Routers Will Enter One Will Leave!

So awhile back I knew the time had come to get into the palm router game. I know some woodworkers are loyal to one brand and their shop is a "Jet Shop" or a "Powermatic" shop. My tool collection seems to be pretty varied although I have exiled ALL that is Harbor Freight! So when I started my research on palm routers there seemed to be two major contenders for the title. 


The Bosch Colt found for about $90 as a stand alone or $180 as a complete package with lots of accessories and bases. 
  • Variable speed dial lets you match speed to workpiece and task.
  • Soft-start reduces start-up torque.
  • Constant Response Circuitry monitors and maintains speed under load.
  • Quick-Clamp System allows motor to be easily adjusted or moved from base to base. Liar liar pants on fire says I. 
  • Convenient front spindle lock for fast, easy one-wrench bit changes.
  • Rubberized grip and unique finger support pockets provide additional support when trimming edges.
  • All-metal straight-edge guide directs router along edges of workpiece or up to 3-5/8" from edge.
  • Fast and precise depth adjustment system with micro-fine adjustment dial.
  • Accepts 1/4" shank bits.


  • And the Dewalt DWP611PK which runs about $115 stand alone or $180 with the plunge base.
    • Router Type Combination (Fixed & Plunge)
    • Power Used (Amps) 7
    • Operating Input Voltage 110 volt / 120 volt @ 60hz (North America)
    • Horsepower (HP) 1.25 HP (.25 more than the Bosch)
    • RPM (Rotations Per Minute) 16,000 to 27,000 (Bosch does go to a higher RPM 35k)
    • Collet Diameter 1/4-Inch
    • Plunge Stroke 2-inch
    • Spindle Lock Yes (The DeWalt lock only takes a tiny bit of depressing to lock which is awesome!)
    • Collet Capacity 1/4-inch
    • Base Dimensions 4-inch standard and 4-3/8-inch x 5-3/4-inch plunge

    After going back and forth and talking to a few fellow woodworkers and Bosch owners, I finally settled on the Bosch Colt stand alone. So I grabbed it at Rockler and headed home to flush trim some book case parts. I soon realized my mistake... In paying attention to mostly price and not extensively handling the product in the store I made an impulsive purchase. I realized my mistake the first time I tried to adjust the bit height... it was difficult and not precise. Basically it's a twist the unit to unlock adjust-ability and then twist the motor back to lock it in place. The problem with this is that it just doesn't have that "I'm totally in control" feeling when adjusting the bit height. I started to play the "No that's too low... no now that's too high." Eventually I got fed up and visions of returning it started to cloud my mind. I first decided to give it a fair shot before sending it packing. The adjustment clamp seemed to be holding on too tightly to allow easy adjustments so i tried to fine tune it's hold. My efforts to dial in that adjustment clamp failed miserably. While routing a small dado I noticed the motor slowly slipping lower. That was it back to Rockler you go young Colt. If there is a company out there in the woodworking industry that understands customers service it's Rockler. I took the Bosch router back and explained that I wanted to get the DeWalt instead they took it back with a smile on their face and I paid the difference. After getting in a few uses on the DeWalt I quickly realized it was by far that better of the two routers. Large adjustments can be done quickly by squeezing two unlock tabs on the side of the base and fine adjustments are accomplished by twisting the adjustment ring for slow fine adjustments. Plus the DeWalt includes creature comforts like bottom mounted LED lights, slow start, and easy spindle lock button, and a base that has better visibility than the all metal Bosch base. I haven't tried the plunge base yes but if it functions as smoothly as the fixed base I'm sure I'll have no issues. 

    My father-in-law said it best "Buy right and cry once." I this case if you're looking to jump into the arena of palm routers I'd tell you just get the DeWalt you won't regret it! 

    Mobile test post on tool porn!

    Now that is tool porn. How could you not think to yourself "I think I need a new hammer or 5."

    Sunday, February 26, 2012

    Kregg Heavy_Duty Bench Klamp

    So I went to Rockler this weekend for their Brown Bag sale and finally broke down and purchased this bad boy with some of my bday funds! After having done several dust frames for a recent commissioned chest of drawers I realized I needed a nice flat clamp/plate combo plus I knew this will look sweet routed and mounted into into my bench. The packaging is simple which is good it's just a plate and clamp no frills needed. The plate seems dead flat upon inspection. The clamp itself has the same quality you'd expect from the rest of the Kreg clamp products which is good. You would think that where the clamp mounts to the plate would be sorta like a key hole cut with a recess underneath for the bolt to slip into. Instead it's a straight non-recessed key hole which means that you will need to route or drill a larger area under the keyhole to slip the clamps plate mounting bolt. I think not recessing the underside of the key hole so I don't have to route a second hole is the one oversight of this product. I'll admit I'm becoming more and more impressed with the Kreg line of tools. While I don't necessarily think pocket holes should be used for any type of that's visible I do think it's great for quick strong joinery that will be hidden. Some of you may argue that I could always plug the pocket holes with the available plugs but I think by the time you glue,plane,and sand those flush you might as well have used a biscuit or a variety of quick to make joint types plus you'll avoid that weird non-matching wood look you see when people do use those plugs. Oh the plate itself generally runs $50-$70 with the clamp included in that price I picked it up for about $53 at Rockler using their 15% off "brown bag" event. I'll try to post pics of installation and final look when i get it in the bench!

    I'll Be The First To Admit

    I don't like watching sports on tv. I know I know as young american male I should be thrilled at the thought of watching football on Sundays, Mondays, or any other day. It's not that I don't appreciate seeing people who are at the top of their game competing with each other but I just don't get anything out of it. For my time I'd rather be creating or building something. I think my motivation to create, build, or learn came from my dad who instead of coming home from work and watching sports went to the garage or yard to work on projects or improve. I never liked the idea of hiring someone to do something that I could learn to do myself! My dad always did things for himself and rarely hired someone come to our home and fix or build something. Instead he'd learn how to do it and fix or build it himself. My dad wasn't like that dad the movies make out to be a moron who tries to fix the sink and ends up flooding the kitchen. My dad fixed the sink and ensured it was done RIGHT! I grew up seeing craftsmanship and determination in action and knew that I wanted to be the same! So that's what you'll find here on my blog my journey in life of producing and doing things with quality craftsmanship like my dad did and what I hope someday my kids will do.